
🧑🤝🧑 How-To Guide: The Residents Section
This section is your central database for managing all residents, which is especially critical in an Aged Care setting. It acts as the "single source of truth" for each person's demographic and location information.
1. How to Access the Residents Section
- Step 1: On the left-hand navigation bar, find and click on the "Residents" link. It is highlighted in purple and has an icon of a person.

2. How to Navigate the Main Residents Page
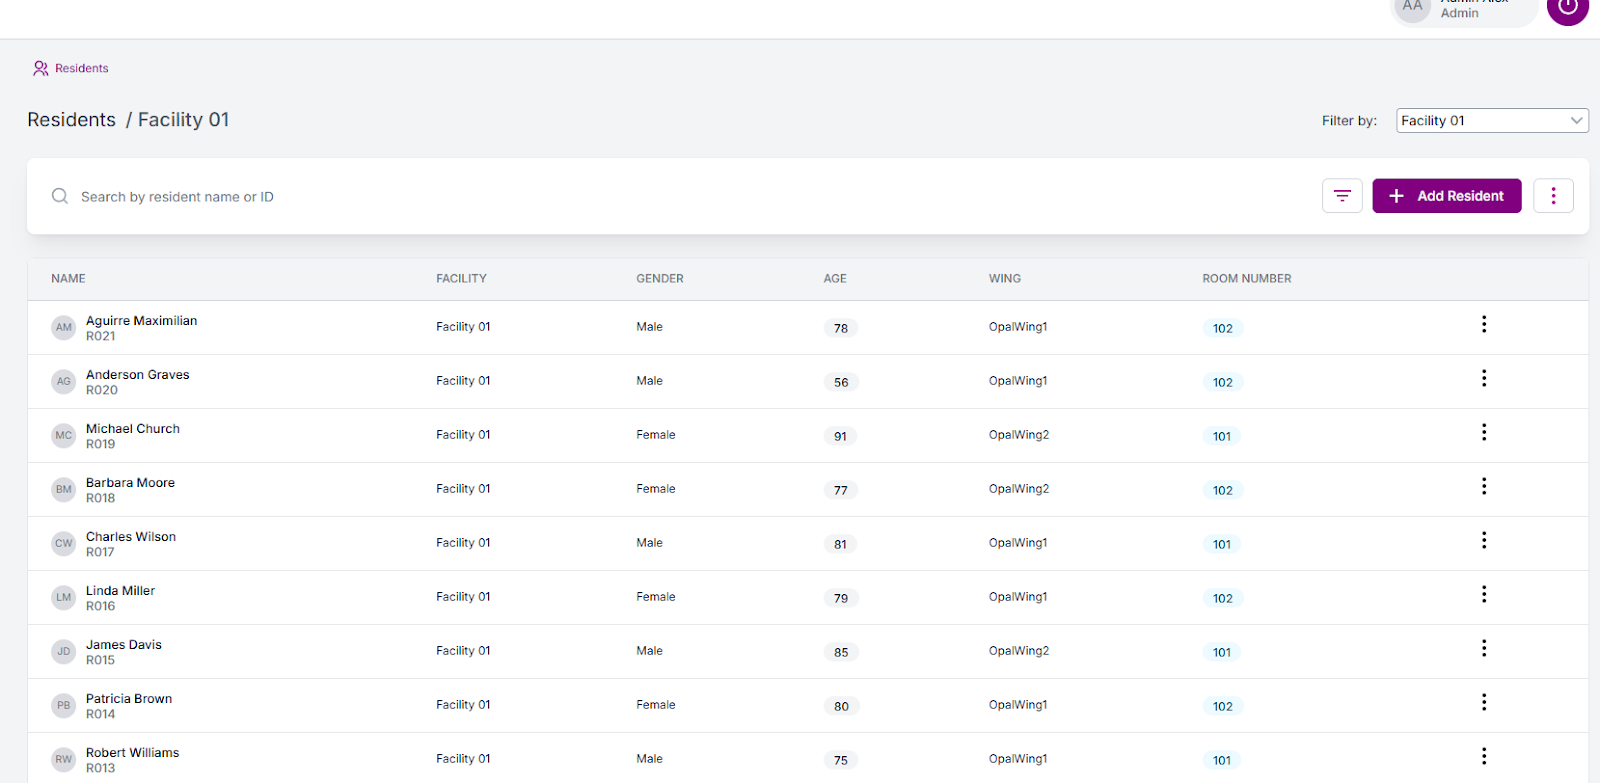
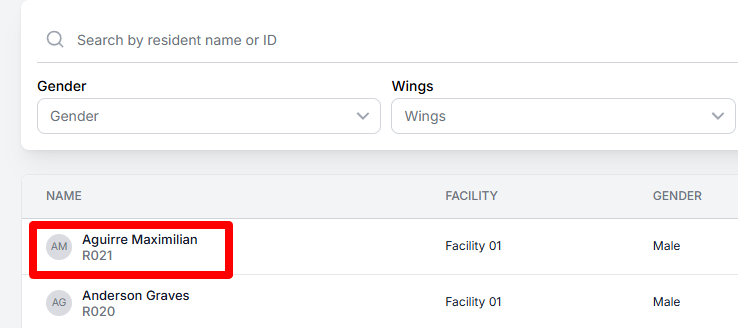
This is the main list view where you can see all residents, as shown in the screenshot below.
- To Filter by Facility:
- At the top-right of the page, use the "Filter by:" dropdown to select which facility's residents you want to see. In your screenshot, it is set to "Facility 01".

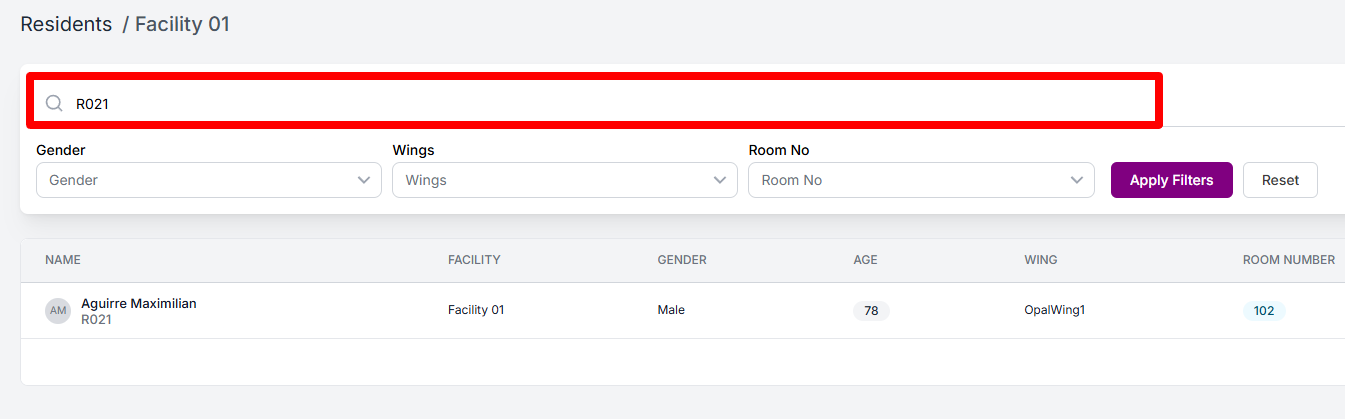
- To Search for a Resident:
- Click inside the search bar that says "Search by resident name or ID".
- Type the resident's name or their ID (e.g., "R021") to quickly find them. The list will update as you type.
- To Understand the Resident List:
- The main table gives you an at-a-glance summary of all residents, including:
- NAME: (e.g., "Aguirre Maximilian") and their ID (e.g., "R021")
- FACILITY: The facility they are assigned to.
- GENDER: (e.g., "Male", "Female")
- AGE: (e.g., "78")
- WING: (e.g., "OpalWing1")
- ROOM NUMBER: (e.g., "102")
- The main table gives you an at-a-glance summary of all residents, including:

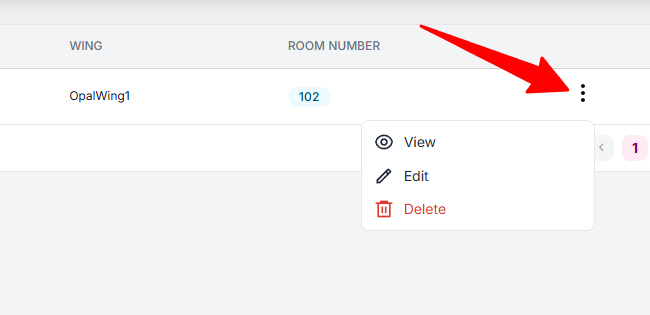
- To Manage an Individual Resident:
- On the far right of any resident's row, click the three-dot icon (⋮) to open a menu with options, such as "Edit" or "Delete".
- To Change Pages:
- At the bottom-right, you can change how many records are shown per page or click the page numbers (e.g., "1", "2") to navigate the list.

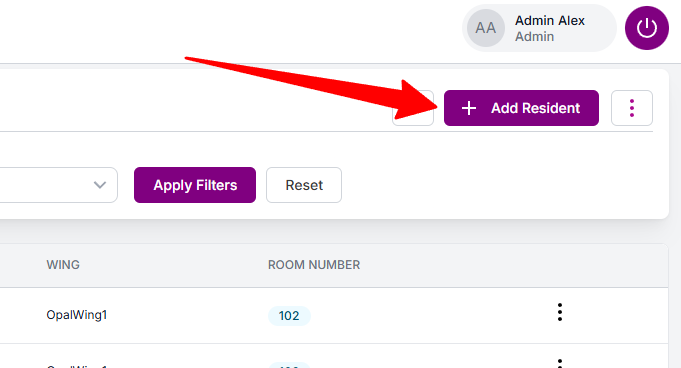
3. How to Add a New Resident
- Step 1: On the main residents list page, click the purple "+ Add Resident" button (located next to the filter button).
- Step 2: This will open a pop-up window, likely titled "Add Resident".
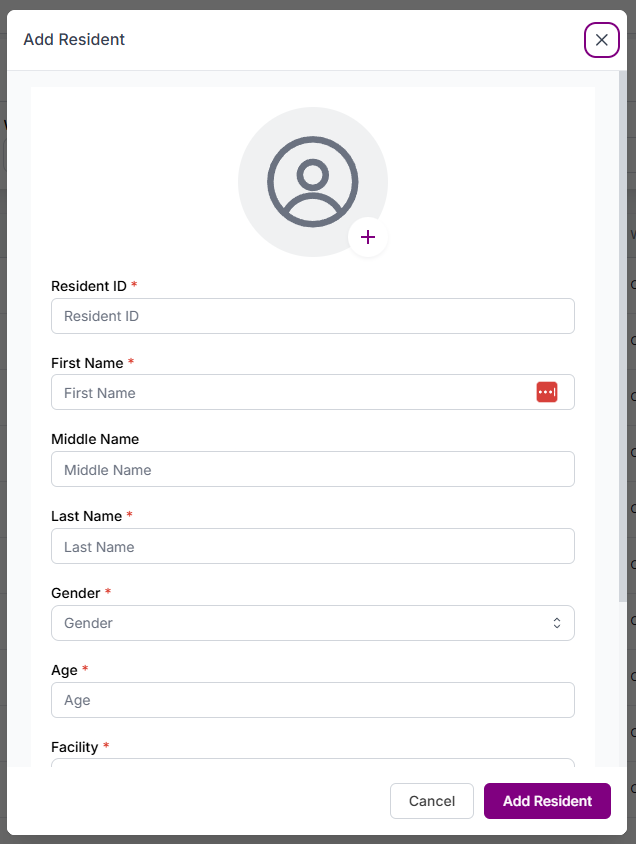
- Step 3: Fill in all the required (marked with a red *) information:
- Resident ID
- First Name
- Last Name
- Gender
- Age
- Facility
- Wing
- Room No
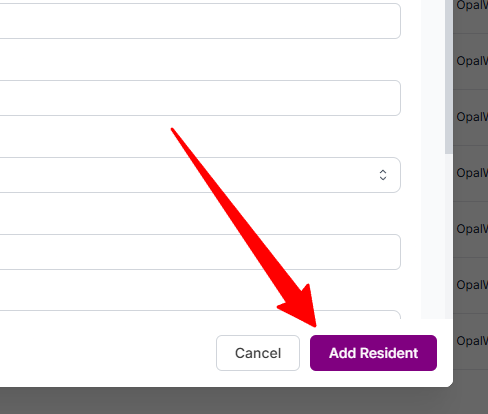
- Step 4: Click "Add Resident" button to create the new resident profile.
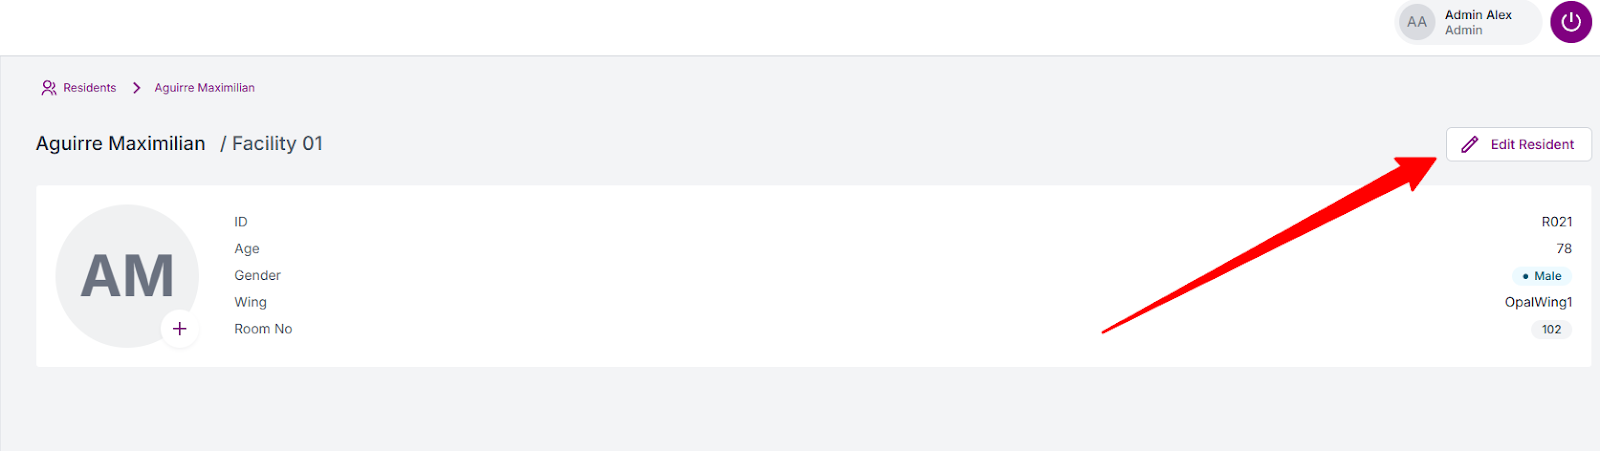
4. How to View a Resident's Profile
- Step 1: From the main residents list, click on a resident's name (e.g., "Aguirre Maximilian").
- Step 2: You will be taken to their individual profile page, as shown below.
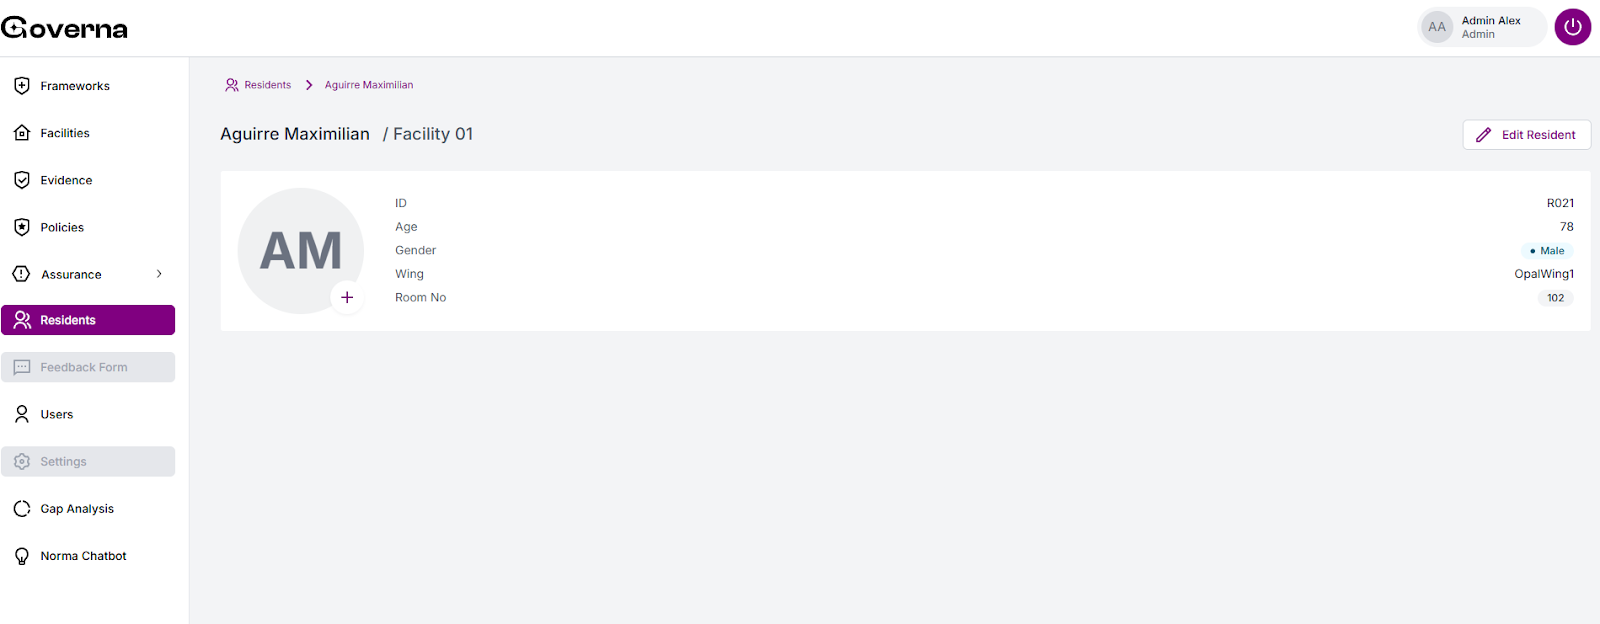
- Step 3: This page shows a summary of their information (ID, Age, Gender, Wing, Room No.). This is also the page where you would likely find other tabs for their care plans, linked incidents, or other personal documentation.
5. How to Edit a Resident's Details
- Step 1: From the resident's profile page, click the "Edit Resident" button in the top-right corner.
- Step 2: The "Edit Resident" pop-up window will appear (as seen in your last two screenshots).
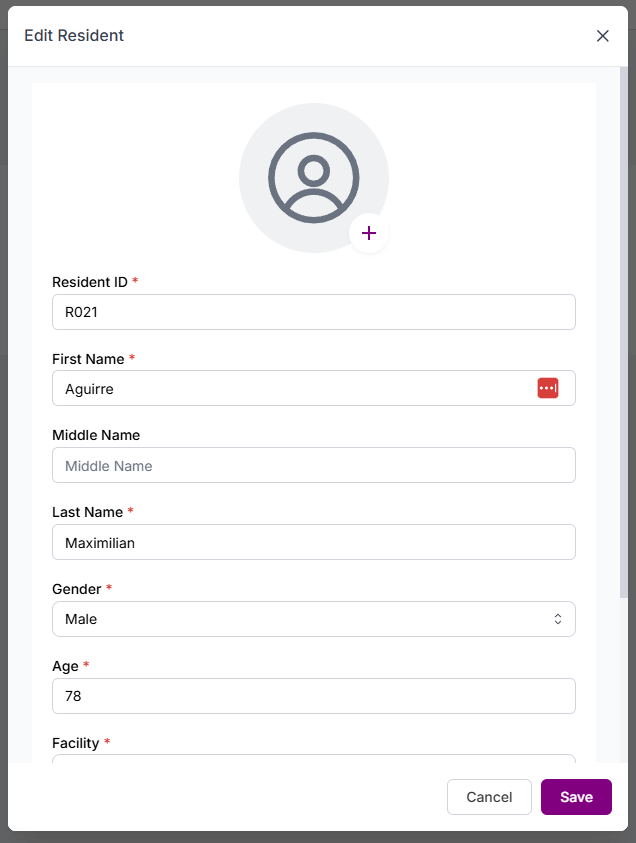
- Step 3: Here you can change any of their details:
- First Name, Middle Name, or Last Name
- Gender
- Age
- The Facility, Wing, or Room No they are assigned to.
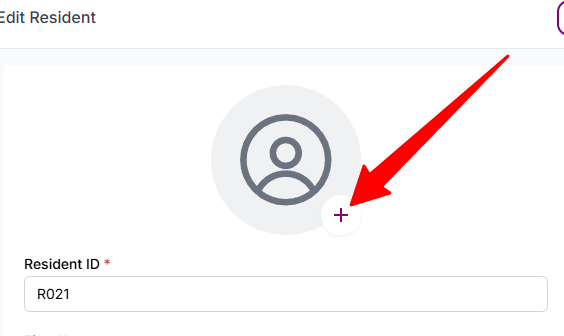
- Step 4: You can also click the plus icon (+) over the generic person image to upload a profile photo for the resident.
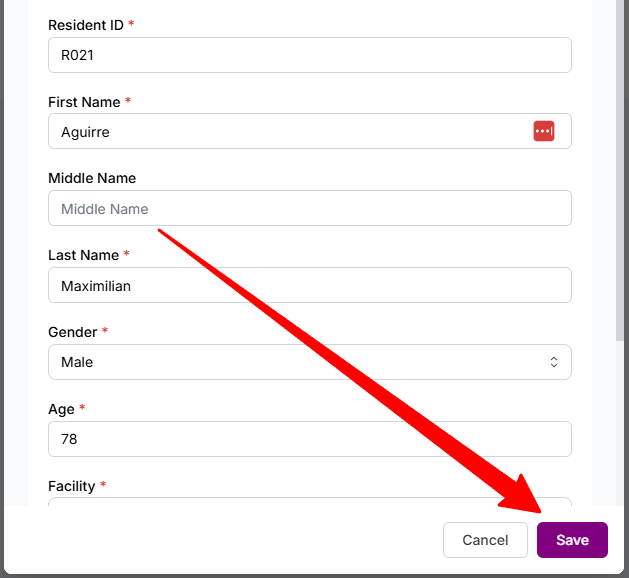
- Step 5: When you are finished with your changes, click the purple "Save" button.
Share Article