📜 How-To Guide: The Policies Section
This section is your central repository for managing all of your organization's policies and procedures. This is where you upload, view, and link your policies to the specific compliance standards they help you meet.
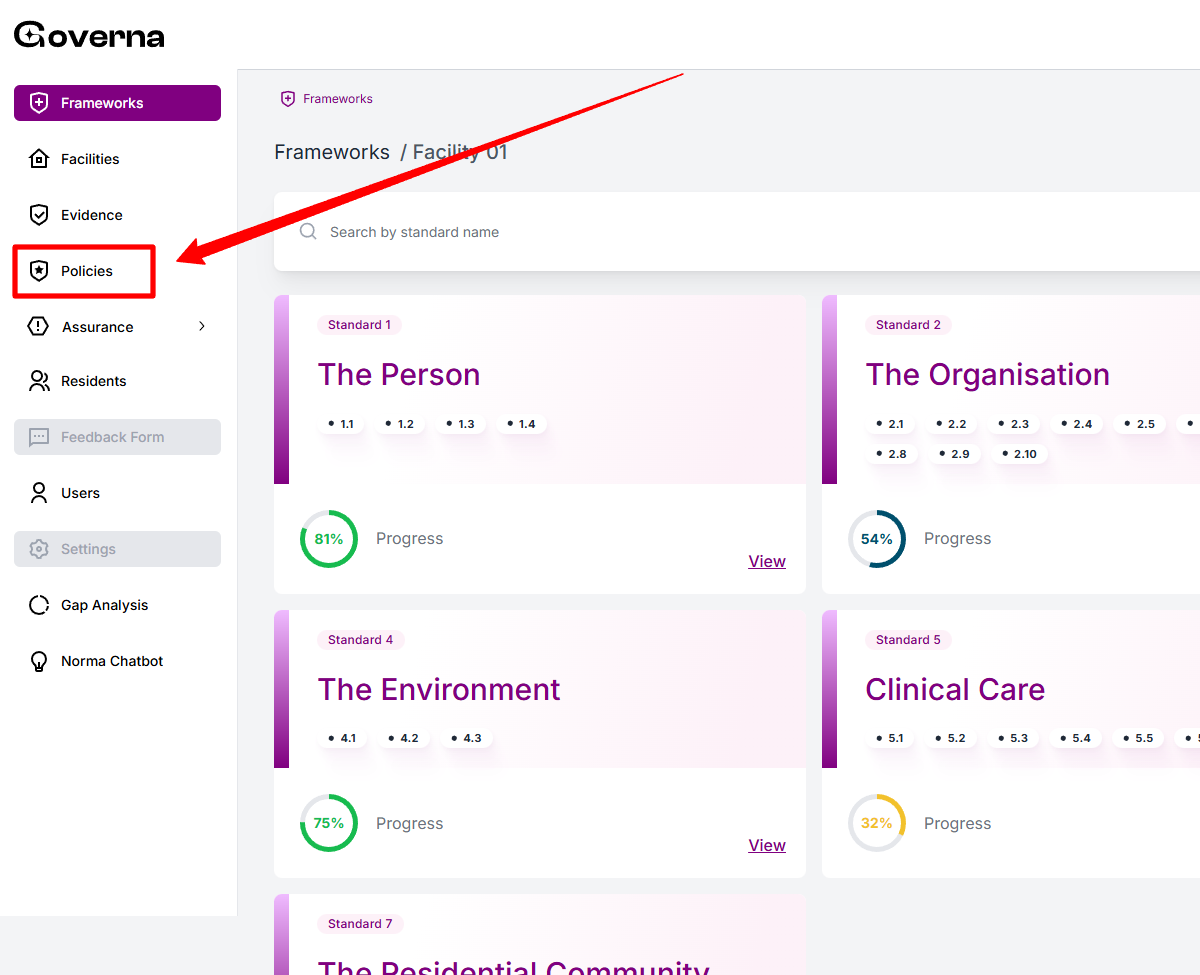
1. How to Access the Policies Section
- Step 1: On the left-hand navigation bar, find and click on the "Policies" link. It has an icon of a shield with a star next to it.
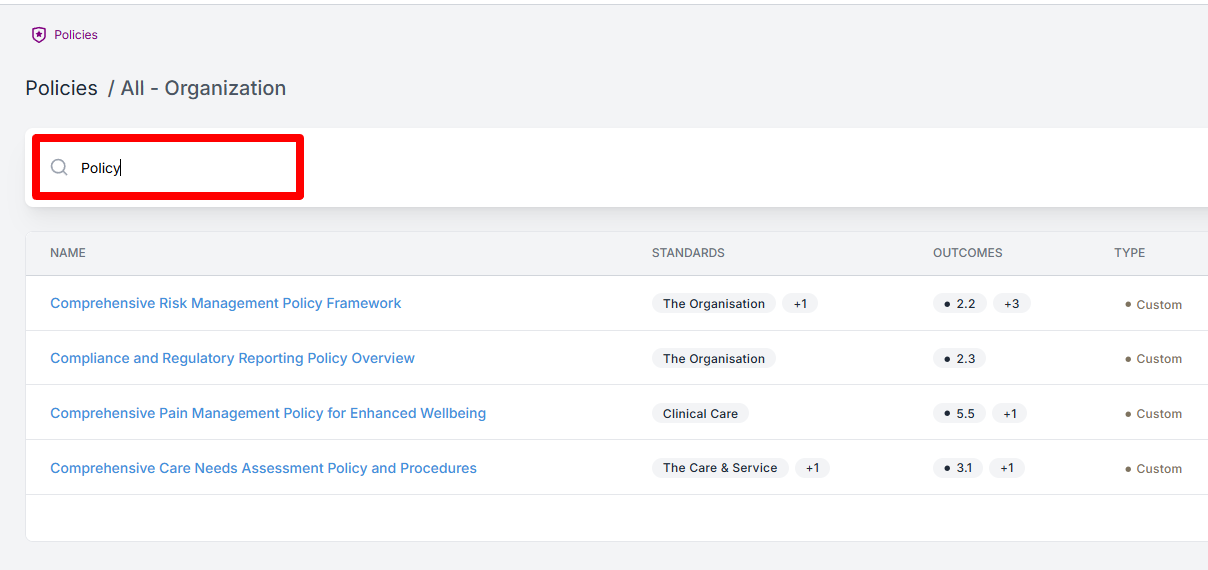
2. How to Navigate the Main Policies Page
This page gives you a complete overview of all policies in the system.
- To View All Policies:
- The main part of the screen is a table listing all your policies. You can see:
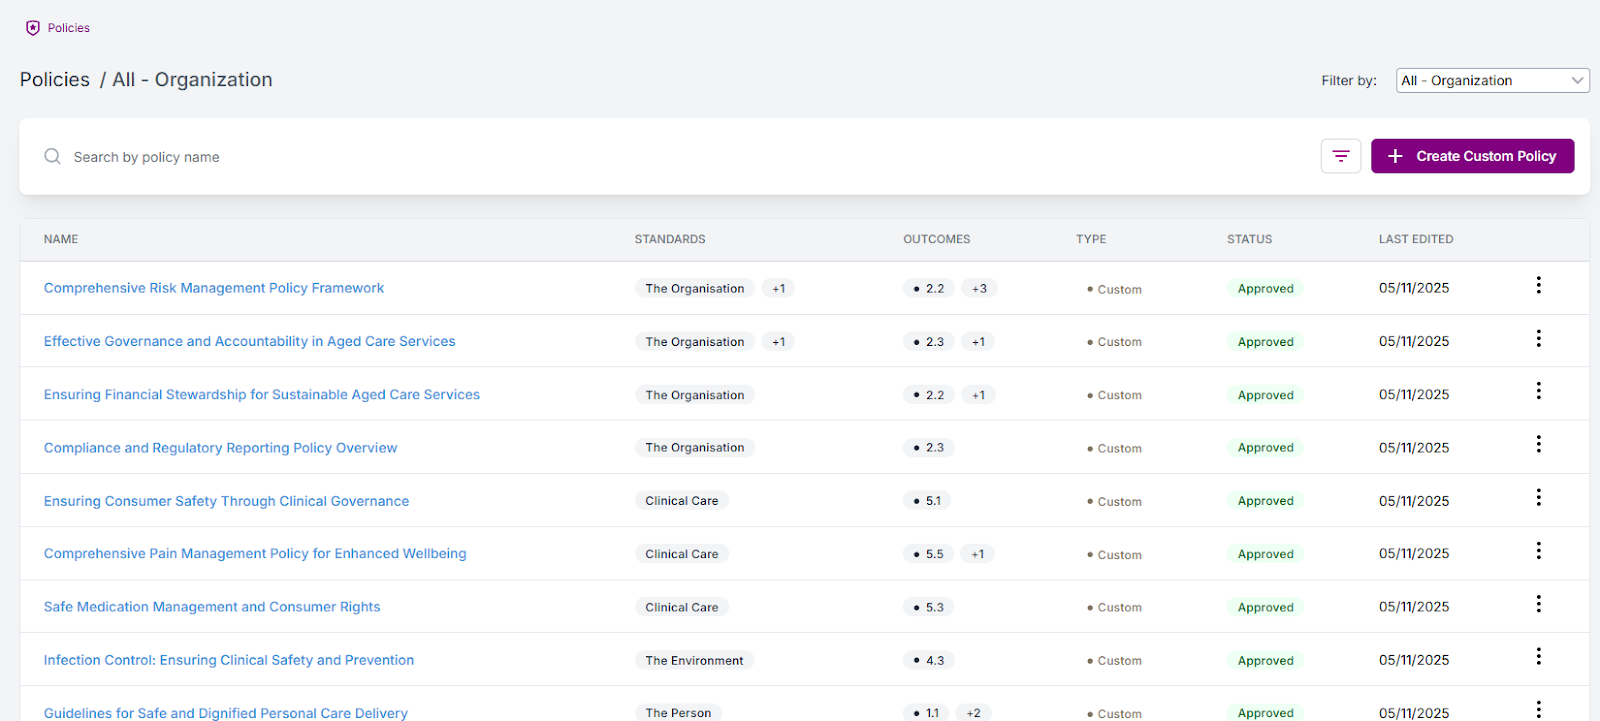
- NAME: The title of the policy (e.g., "Effective Governance and Accountability in Aged Care Services").
- STANDARDS: Which standard(s) the policy is linked to (e.g., "The Organisation"). A "+1" indicates it's linked to one more standard.
- OUTCOMES: Which specific outcome(s) the policy supports (e.g., "2.3"). A "+1" indicates it's linked to one more outcome.
- TYPE: The policy type, such as "Custom".
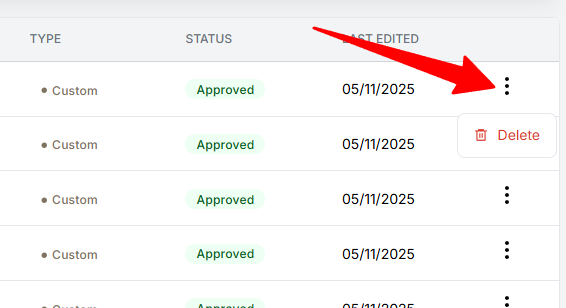
- STATUS: The current status of the policy (e.g., "Approved").
- LAST EDITED: The date the policy was last modified.
- To Filter by Facility:
- At the top right, click the "Filter by:" dropdown (which defaults to "All - Organization").
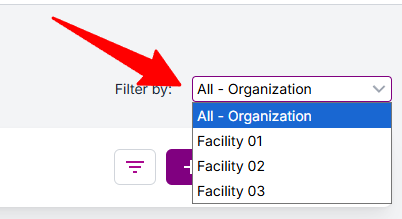
- Select a specific facility from the list to see only the policies that apply to that location.
- To Search for a Policy:
- Use the search bar at the top left that says, "Search by policy name".
- Type the name of a policy, and the list will filter as you type.
- To Manage an Existing Policy:
- To the far right of any policy in the list, click the three-dot icon (⋮) to open a menu with options like ""Delete".
3. How to Create a New Custom Policy
This process allows you to upload a new policy document into the Governa system.
- Step 1: Open the Create Policy Window
- In the top-right corner, click the purple "+ Create Custom Policy" button.
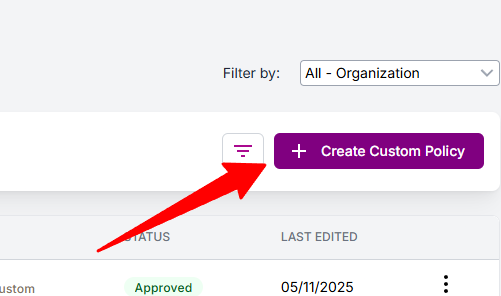
- This will open the "Create Custom Policy" pop-up window.
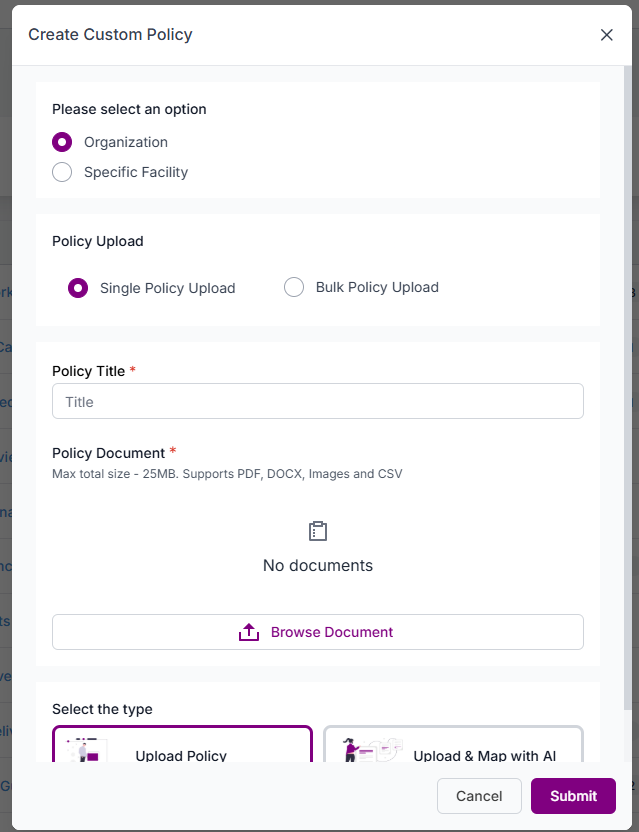
- Step 2: Select the Scope
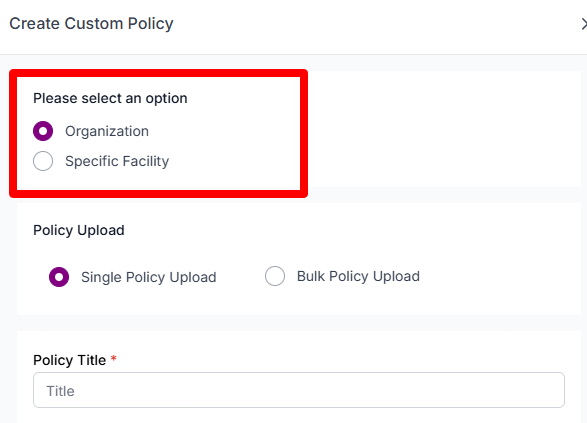
- Under "Please select an option", choose where this policy applies:
- Organization: Select this if the policy is for the entire company (this is the default).
- Specific Facility: Select this if the policy is for one location only.
- Step 3: Choose the Upload Method
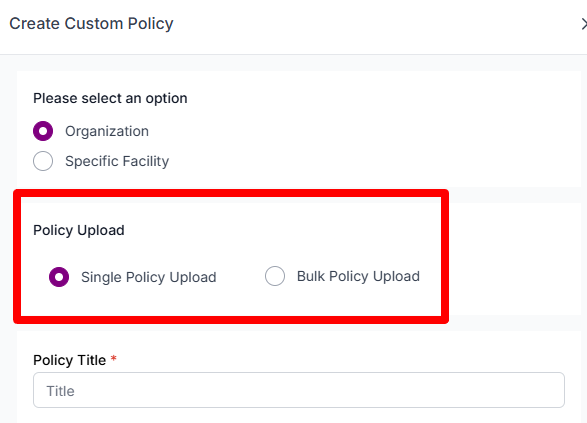
- Under "Policy Upload", select your method:
- Single Policy Upload: Choose this to upload one document (this is the default).
- Bulk Policy Upload: Choose this if you have multiple policy documents to upload at once.
- Step 4: Fill in the Policy Details
- Policy Title *: (This is required) Give your policy a clear, official title (e.g., "Infection Control and Prevention Policy").
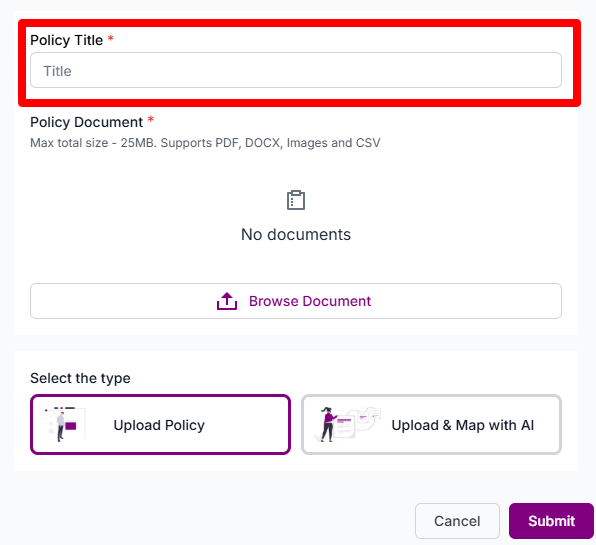
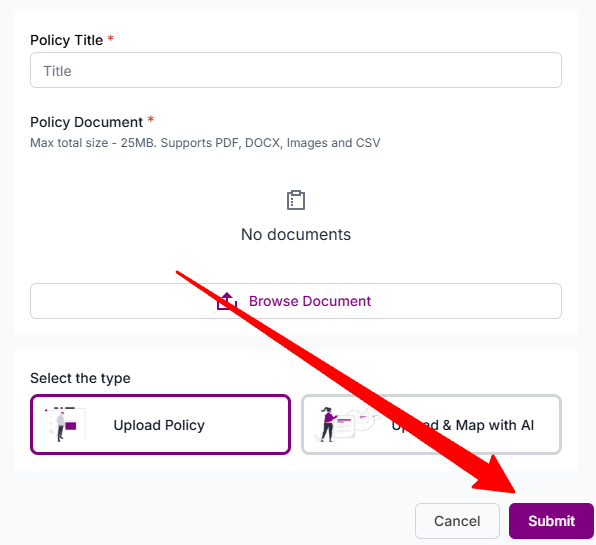
- Step 5: Upload the Policy Document
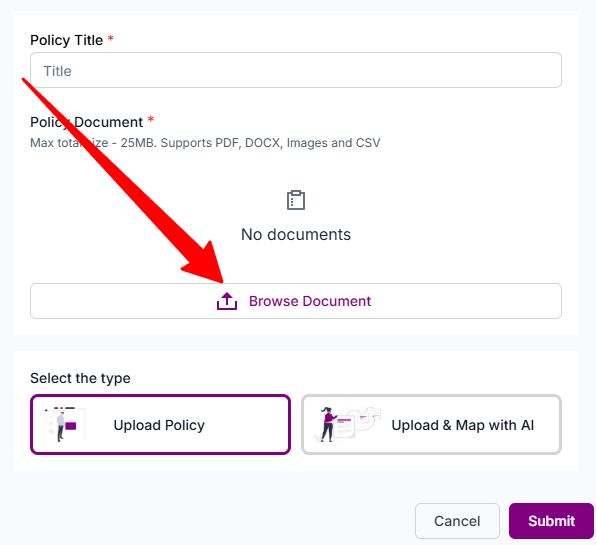
- Under "Policy Document *", click the "Browse Document" button.
- Select the file from your computer. The system supports PDF, DOCX, Images, and CSV files up to 25MB.
- Step 6: Choose the Mapping Type
- At the bottom, under "Select the type", you have two options. This "mapping" links your policy to the standards and outcomes it proves you are meeting.
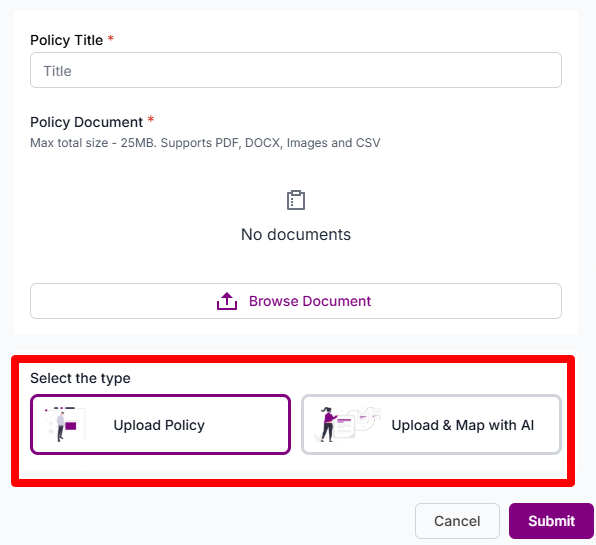
- Upload Policy: This is the standard option. After uploading, you will likely need to manually link this policy to the relevant standards and outcomes.
- Upload & Map with AI: This is an advanced feature. The system's AI will read your policy document and automatically suggest which standards and outcomes it relates to, saving you time.
- Step 7: Finalize the Upload
- Click the purple "Submit" button to upload the policy.
Share Article