
📎 How-To Guide: The Evidence Section
This section is your central digital library for all documents and files that prove your organization's compliance. It's where you store the proof that you are following your policies.
1. How to Access the Evidence Section
- Step 1: On the left-hand navigation bar, find and click on the "Evidence" link. It has a shield-with-a-check icon next to it.

2. How to Add New Evidence
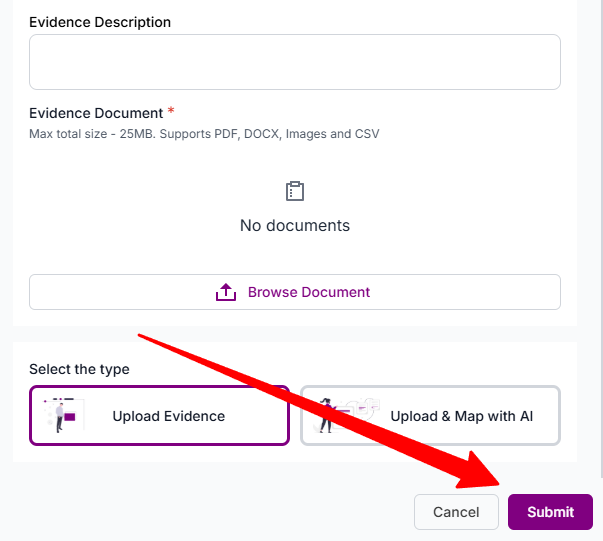
This is the process for uploading a new document and linking it to your compliance framework, based on the "Create Custom Evidence" window.
- Step 1: Start the Upload
- Once in the Evidence section, look for a button labeled "+ Create Evidence".
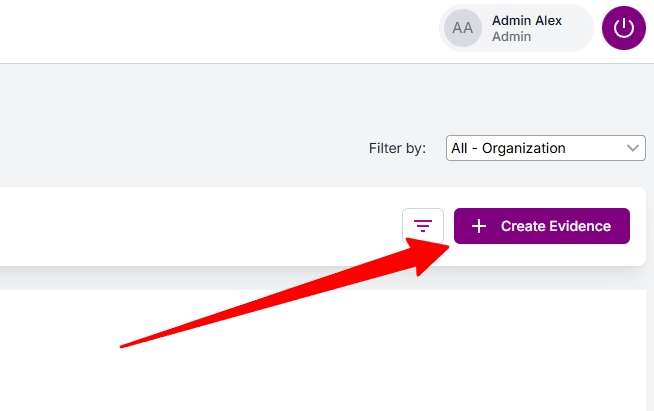
- Clicking this will open the "Create Custom Evidence" pop-up window.
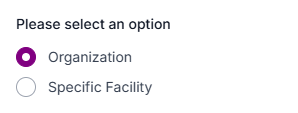
- Step 2: Select the Scope
- Under "Please select an option", choose where this evidence applies:
-
- Organization: Select this if the evidence is for the entire company (e.g., a company-wide handbook).
- Specific Facility: Select this if the evidence is for one location only (e.g., a "Facility 01" inspection report).
-
- Step 3: Choose the Upload Method
- Under "Evidence Upload", select your method:
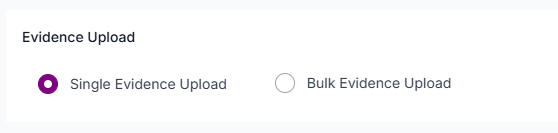
- Single Evidence Upload: Choose this to upload one document.
- Bulk Evidence Upload: Choose this if you have multiple documents to upload at once.
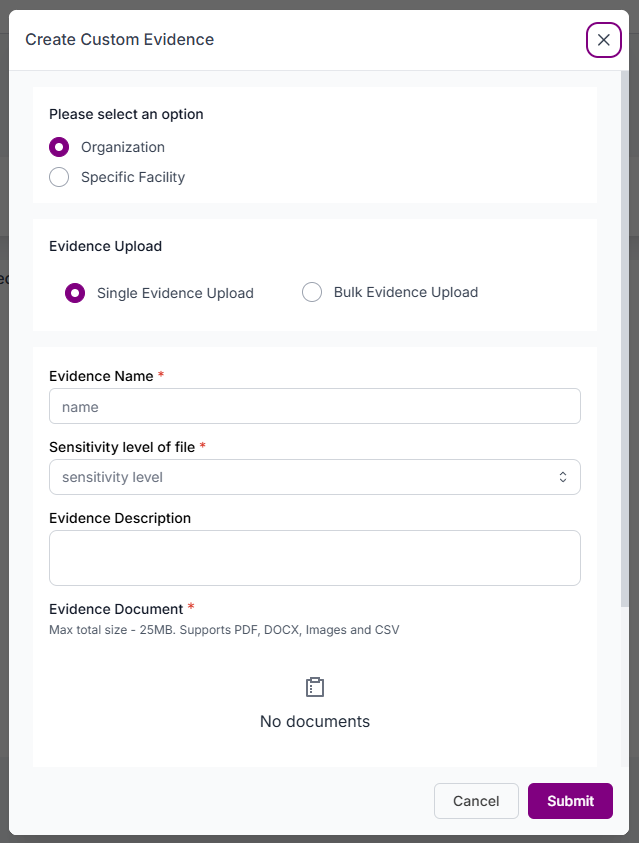
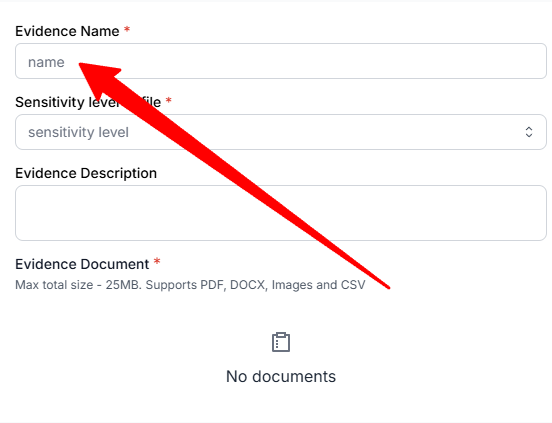
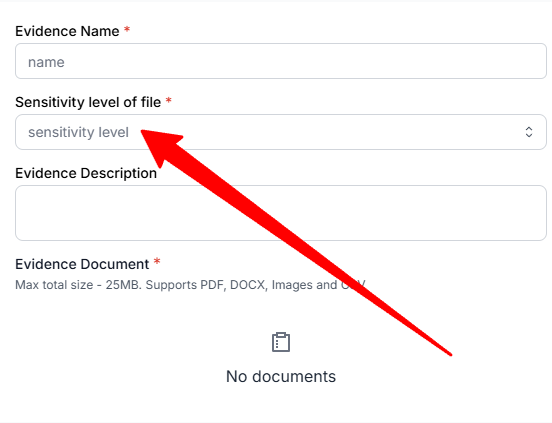
- Step 4: Fill in the Document Details
- Evidence Name *: (This is required) Give your document a clear, descriptive name (e.g., "Q4 Hand Hygiene Audit" or "Staff Training Records - May").
- Sensitivity level of file *: (This is required) Click the dropdown and select the appropriate security level from the options: High, Medium, or Low.
- Evidence Description: (This is optional but recommended) Add more context or a summary of what the document contains.

- Step 5: Upload the File
- Under "Evidence Document *", click the "Browse Document" button.
- Select the file from your computer. The system supports PDF, DOCX, Images, and CSV files up to 25MB.
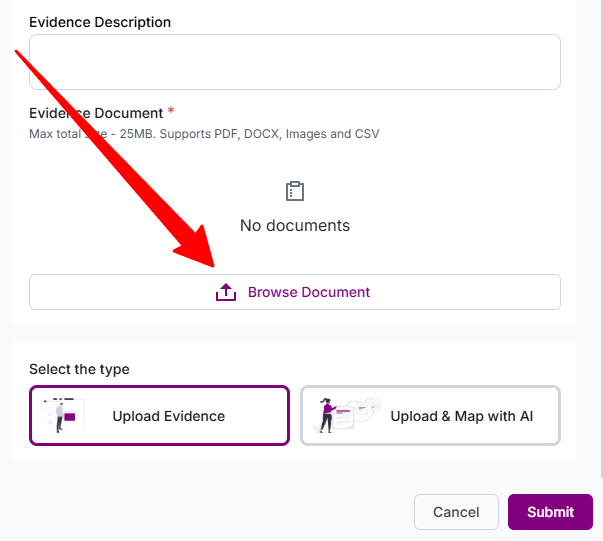
- Step 6: Choose the Mapping Type
- At the bottom, under "Select the type", you have two powerful options. This is the "Evidence Mapping" feature.
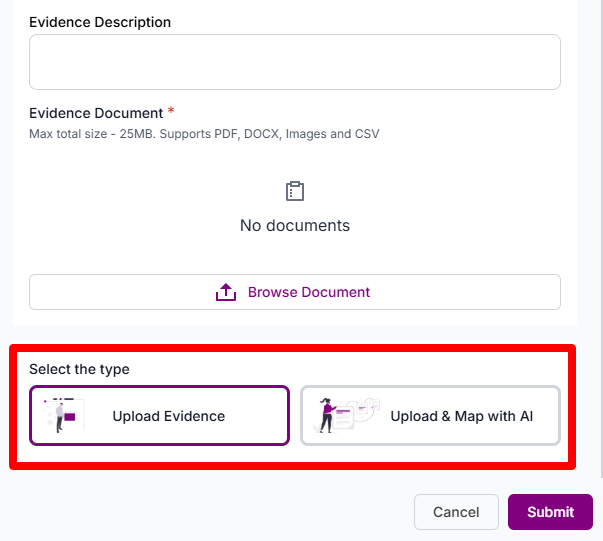
- Upload Evidence: This is the standard option. After uploading, you will likely need to manually find this document and link it to the specific standards or outcomes it supports.
- Upload & Map with AI: This is an advanced feature. The system's AI will likely read your document and automatically suggest which standards, outcomes, or policies it relates to, saving you time.
- Step 7: Finalize the Upload
- Click the purple "Submit" button to upload the document.
- If you chose "Upload & Map with AI", you may be taken to a new screen to review and approve the AI's suggestions.
Why this section is important: This process creates a "transparent and auditable compliance trail". When an auditor asks how you meet a specific standard (e.g., "Standard 4: The Environment"), you can go to that standard in Governa and show them the exact, linked documents that prove it.
Share Article